Agility is a fundamental skill that every athlete should aim to improve. Agility exercises are exercises designed to improve your ability to move quickly and change direction effectively. These drills are often used in sports and fitness training to improve performance, prevent injuries, and enhance overall athleticism.
What Is Agility?
Agility is the ability to change direction quickly and efficiently while maintaining balance and control. It involves a combination of physical attributes, including speed, coordination, balance, and reflexes. Athletes with exceptional agility can react swiftly to unpredictable situations, making them more competitive and adaptable in their respective sports.
The Synergy of Speed and Agility
Speed is the ability to cover a specific distance in the shortest amount of time. It’s often measured as how fast an athlete can move in a linear direction. Speed is crucial in sports that require rapid bursts of acceleration, such as sprinting, track and field, and football.
Unlike speed, which focuses on linear movement, agility encompasses multi-directional skills. While speed and agility are distinct attributes, they often go hand in hand. An athlete with explosive speed can become even more formidable with improved agility, as they can utilize their velocity more effectively. Conversely, an agile athlete can maximize their effectiveness by enhancing their speed.
Agility training is a great way to help develop speed as well as becoming agile. By incorporating specific training drills and exercises into your regimen, you can develop the dynamic duo of speed and agility, giving you a competitive edge in your chosen sport.
How to Improve Agility
1. Incorporate Agility Drills
Agility drills are specifically designed exercises that target your agility. These drills often involve quick changes in direction, lateral movements, and rapid accelerations and decelerations. Some popular agility drills include cone drills, ladder drills, and shuttle runs. Incorporate these drills into your training regimen to improve your agility over time.
2. Work on Footwork and Coordination
Footwork is a crucial aspect of agility. Practice precise footwork to improve your ability to pivot, change direction, and navigate obstacles effectively. Jump rope exercises, ladder drills, and ladder-based footwork drills can help enhance your coordination and foot speed.
3. Enhance Reaction Time
Agility is not just about physical speed; it also involves mental quickness. You can improve your reaction time through specific drills and exercises. Reaction ball drills, where you bounce a ball against a wall and react to its unpredictable bounce, are an excellent way to train your brain to respond rapidly to changing situations.
4. Strength and Power Training
Having a strong lower body is essential for agility. Incorporate strength and power exercises like squats, lunges, deadlifts, and plyometrics into your workout routine. Strong leg muscles provide a solid foundation for quick and powerful movements.
5. Balance and Stability Work
Agility requires excellent balance and stability. Exercises like single-leg squats, balance board drills, and pilates can help you develop better balance and proprioception (awareness of your body’s position in space). Improved balance allows you to maintain control during rapid directional changes.
6. Sport-Specific Training
If you’re an athlete, consider incorporating sport-specific agility drills into your training. These drills mimic the movements and scenarios you’ll encounter during your sport, making your agility training more relevant and effective.
By incorporating agility drills, focusing on footwork, enhancing reaction time, and maintaining a balanced training regimen, you can significantly boost your agility. Remember that agility training is not a one-size-fits-all approach; tailor your workouts to your specific goals and needs. With dedication and consistent effort, you’ll become a more agile and capable athlete or individual.
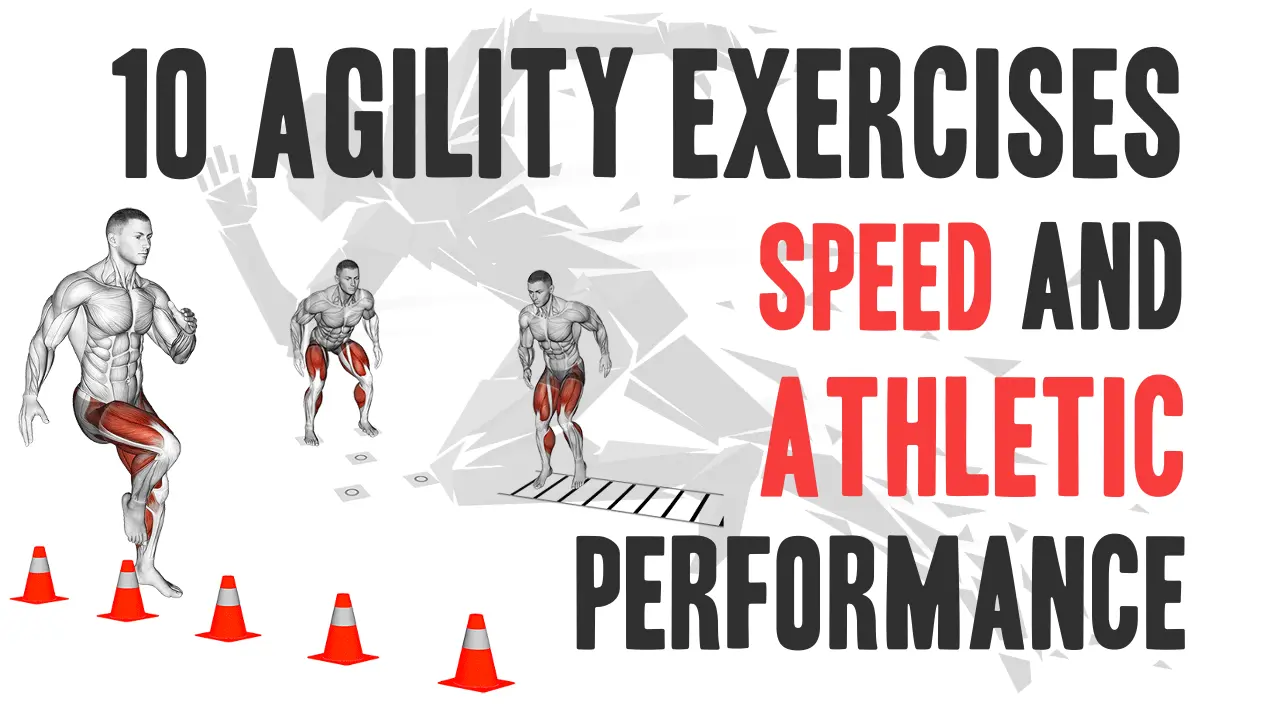
10 Agility Exercises to Increase Speed and Agility
If you’re looking to increase your speed and agility, incorporating specific exercises into your training routine can make a significant difference. These exercises help improve your ability to change direction quickly, maintain balance, and react swiftly, all of which are essential for various sports and physical activities. Here are ten agility exercises to help you boost your speed and agility:
1. Agility Ladder Drill
The agility ladder drill, is a fundamental exercise for improving agility, footwork, coordination, and speed. This is a flat ladder made of straps or ropes that are placed on the ground. The ladder rungs are typically spaced 12-18 inches apart. These drills involve moving quickly and precisely through a ladder-like arrangement of rungs on the ground. It’s a favorite among athletes and sports coaches for its effectiveness in enhancing athletic performance.
Why the Ladder Drills?
- Improved Footwork: The ladder drill challenges you to move your feet quickly and precisely through a pattern of squares or rungs. This enhances your footwork and helps you become more light-footed and agile.
- Enhanced Coordination: Coordinating your feet as you navigate the ladder’s rungs promotes better overall coordination. This is valuable not only for sports but also for daily activities.
- Speed Development: The ladder drill’s quick and controlled movements are excellent for building speed. As you progress, you’ll notice improvements in your sprinting and acceleration.
- Injury Prevention: Better agility and coordination can help reduce the risk of injuries, particularly ankle sprains and twists, by enhancing your ability to react and move in various directions.
Instructions:
- Equipment: You’ll need an agility ladder, which is a flat ladder-like apparatus with rungs or boxes on the ground. You can find agility ladders in sporting goods stores or easily create one with tape on a flat surface.
- Warm-Up: Begin with a proper warm-up to prepare your muscles for the agility work ahead. Warm-up exercises may include light jogging, dynamic stretches, or jumping jacks.
- Basic Movements: Start with basic ladder movements like high-knee marches. Stand at the ladder’s entrance and lift your knees as high as possible while stepping into each box. Alternate your legs as you move through the ladder. Ensure that your arms are moving rhythmically to maintain balance.
Progression: As you become more comfortable, progress to more advanced lateral movements like the lateral shuffle or the lateral scissor. These movements involve side-to-side motions and challenge your agility in different directions.
Variation: Lateral Agility Ladder Drills
The lateral ladder drill is an evolution of the classic ladder drill, specifically designed to enhance your lateral (side-to-side) agility. This exercise is favored by athletes, especially those in sports like basketball, soccer, and tennis, where rapid lateral movements are crucial.
Why the Lateral Ladder Drills?
Lateral agility is essential for athletes who need to change direction quickly, evade opponents, or cover ground laterally.
- Enhanced Lateral Movement: The primary focus of this drill is to develop your ability to move laterally with precision and speed. This translates directly to improved on-field or on-court performance.
- Improved Balance and Coordination: As with the traditional ladder drill, the lateral variation enhances overall coordination and balance. These attributes are valuable for maintaining stability during lateral movements and preventing injuries.
- Sports Specificity: Many sports involve lateral movements, such as lateral shuffles, defensive slides, or quick cuts. Practicing these movements in the ladder drill format allows you to simulate game scenarios and improve your performance.
Instructions:
- Basic Movements: Begin by standing next to the ladder with one foot on the outside of the first square and the other foot inside it. Your body should be facing sideways.
- Lateral Shuffle: Initiate the drill by moving laterally, stepping your inside foot into the square followed by your outside foot. Then, bring your inside foot out of the square, followed by your outside foot. Continue this shuffle pattern throughout the ladder.
- Quick and Controlled: Focus on maintaining a quick and controlled rhythm as you shuffle through the ladder. Keep your knees slightly bent and your body low to the ground for optimal balance.
- Variations: To challenge yourself further, try lateral scissor movements or lateral hopscotch patterns within the ladder. These variations add complexity and intensity to your training.
- Speed and Precision: As with the classic ladder drill, you can increase the pace as you become more proficient. Always prioritize precise foot placement over speed to ensure safety and effectiveness.
2. Zig Zag Hops:
Zig Zag Hops are an agility exercise that focuses on lateral movement and quick changes in direction. This drill is particularly useful for athletes in sports like soccer, football, and basketball, where the ability to navigate through opponents and change directions rapidly is crucial.
Why Zig Zag Hops?
- Lateral Agility: This drill enhances lateral quickness, which is essential for evading opponents, changing direction, and improving overall agility.
- Coordination: The precise footwork required in Zig Zag Hops improves coordination and body control.
- Change of Direction: Practicing quick changes in direction can significantly improve an athlete’s ability to react swiftly during gameplay.
- Conditioning: This exercise provides a cardiovascular workout while also targeting lateral agility and neuromuscular coordination.
Instructions:
- Setup:
- 12-15 cones arranged in a straight line with short distances between them.
- Position yourself at the starting point, facing the row of cones.
- Starting Position:
- Stand with your feet shoulder-width apart.
- Bend your knees slightly to prepare for the first jump.
- Execution:
- Begin the drill by jumping diagonally to your right, landing on the right side of the first cone.
- As you land on the right side of the first cone, use your right leg as the jumping leg for the next jump.
- Jump diagonally to your left, clearing the first cone and landing on the left side of the second cone.
- Continue this diagonal hopping pattern, alternating your landing leg with each jump, as you move through the row of cones.
- Focus on maintaining quick, controlled, and precise movements as you navigate through the cones.
- Continuous Movement:
- Execute the jumps continuously without stopping between cones. The goal is to maintain a fluid and unbroken motion.
- Completion:
- Complete the drill when you’ve successfully navigated through all the cones, landing on both sides of each cone in the zigzag pattern.
3. X Drill
X Drill is a widely used cone-based agility training designed to improve the athlete’s footwork and agility. It incorporates various movements, including forward, lateral, and diagonal agility patterns. This drill is excellent for athletes who need to enhance their quickness, change of direction, and overall agility.
Why the X Drill?
- Agility Improvement: This drill targets multiple directions of movement, helping athletes become more agile and responsive in various sports and activities.
- Footwork Enhancement: The X Drill emphasizes quick footwork, improving an athlete’s ability to change direction rapidly and maintain balance.
- Conditioning: The drill’s high-intensity nature provides a cardiovascular workout while also working on agility and coordination.
- Sport-Specific Training: The X Drill can be tailored to suit the specific agility requirements of different sports, such as football, soccer, basketball, fighting sports, and more.
Instructions:

- Equipment: You’ll need four cones to set up the drill in a 5 by 5-yard square or box. Ensure the cones are stable and evenly spaced.
- Setup:
- Place the cones at the corners of the 5 by 5-yard box. This forms an “X” pattern with the cones.
- Stand at one of the corners of the box to begin the drill.
- Execution:
- Start by sprinting diagonally to the opposite cone, making sure to touch or reach the cone.
- After reaching the diagonal cone, shuffle laterally to the next cone.
- From there, sprint diagonally to the next cone.
- Finally, sprint forward to the last cone.
- Repeat:
- After reaching the last cone, immediately reverse the sequence. Sprint diagonally, shuffle laterally, sprint diagonally, and then sprint forward to return to the starting cone.
- Continuous Movement:
- Keep the movements fluid and continuous without stopping between transitions.
- Focus on maintaining proper form, especially during lateral shuffling, to avoid crossing your feet and losing balance.
- Repetitions and Sets:
- Perform the X Drill for a predetermined number of repetitions and sets. A common sequence is to complete the drill three times, but you can adjust based on your fitness level and training goals.
4. Agility Balls (Reaction Ball)
Agility balls, a staple in reaction training, are excellent tools for improving your hand-eye coordination and reaction time. These unique balls have unpredictable bounce patterns, making them valuable assets in agility-focused workouts.
Why Agility Balls?
Agility balls, also known as reaction balls, are designed to bounce erratically, making them perfect for enhancing your agility and reflexes.
- Hand-Eye Coordination: Agility balls force you to track the ball’s movement, adjust your position, and react quickly. This promotes better hand-eye coordination, which is vital in many sports and activities.
- Reflex Training: The unpredictable bounce of agility balls challenges your reflexes. Regular practice with these balls can help you react faster to unexpected situations, whether on the field, court, or in everyday life.
- Versatility: Agility balls can be used for various exercises, including solo drills where you bounce the ball against a wall or partner drills that involve passing the ball back and forth. They’re versatile tools that cater to different fitness levels.
Instructions:
- Starting Position:
- Hold the reaction ball in one hand. It’s recommended to start with your dominant hand to get used to the drill.
- Assume a comfortable athletic stance with your feet shoulder-width apart. Your knees should be slightly bent, and you should be on the balls of your feet.
- Throwing the Ball:
- Hold the reaction ball at chest level with your arm slightly bent. Keep your elbow close to your body.
- Use your wrist, arm, and core muscles to throw the reaction ball against the wall. The key is to create an unpredictable bounce by using various angles and spins in your throw.
- Reacting and Catching:
- As the ball bounces back from the wall, quickly react to its movement with the same hand that threw it.
- Focus on tracking the ball’s trajectory and adjust your hand positioning to catch it accurately. This may require rapid hand and arm movements.
- Repetition:
- Repeat the throws and catches for a set number of repetitions or a specified time period. You can gradually increase the difficulty by changing the distance from the wall, the angle of your throws, or the speed and spin of your throws.
- Variations:
- To make the drill more challenging, you can incorporate your non-dominant hand, alternating throws between hands.
- You can also perform the drill with a partner, having them throw the ball to you at varying speeds and angles.
5. 5 Dot drills
5 Dot drills are a dynamic set of agility exercises that provide a fantastic way to elevate your speed, coordination, and overall agility. These drills require you to move swiftly and decisively between five markers on the ground. Incorporating plyometric movements, 5 Dot drills offer a holistic approach to agility enhancement.
Why 5 Dot Drills?
- Speed Development: Moving rapidly between markers challenges your sprinting and acceleration capabilities. You’ll notice improvements in your overall speed.
- Enhanced Coordination: These drills emphasize precise footwork and quick changes of direction, promoting better coordination and body control.
- Improved Agility: The multidirectional movements required in 5 Dot drills enhance your agility, enabling you to navigate obstacles and opponents with ease.
- Plyometric Training: Many 5 Dot drills incorporate plyometric elements, such as jumps and explosive movements. This helps build lower-body power and explosiveness.
Instructions:
- Setup:
- Place the five markers on the ground to create the following layout: A-B-C-D-E.
- Stand on the first two markers, A and B.
- Initial Position (A-B):
- Start with your feet together on markers A and B.
- Jump to Point C:
- Quickly jump forward for C with both feet to land on C with your left foot.
- Focus on using your lower body explosiveness to make this jump.
- Jump to D and E (Split Feet):
- From marker C, jump explosively again, but this time split your feet so that one foot lands on marker D and the other foot lands on marker E.
- Backward Jump:
- Quickly jump backwards with both feet to land on the C mark with your left foot.
- After landing on C, immediately jump backward again to return to the starting position, markers A and B, with both feet together.
- Make sure to maintain control and balance throughout the movement.
- Repeat:
- Repeat the movement on your right leg. (for a total of six rounds).
- Try to complete the drill as quickly as possible while maintaining proper form.
6. Balloon Drill
The balloon drill is a delightful and effective way to infuse fun into your agility training regimen. By tossing a balloon into the air and incorporating exercises like squats, push-ups, or burpees before catching it, you challenge your agility, speed, and reaction time in an engaging and playful manner.
Why the Balloon Drill?
- Enhanced Agility: The unpredictability of the balloon’s movement forces you to react quickly to catch it. This sharpens your agility and reflexes.
- Cardiovascular Workout: Incorporating exercises between balloon tosses elevates your heart rate, providing cardiovascular benefits along with agility training.
- Enjoyment: The balloon drill is inherently fun, making it an excellent option for those who find traditional agility drills monotonous.
Instructions:
- Balloon Throw:
- Begin by holding a balloon and tossing it into the air.
- Aim to give the balloon a good height and trajectory.
- Quick Exercise:
- As soon as you release the balloon, immediately perform a set of exercises, such as squats, push-ups, and a burpee.
- You can decide the number of repetitions or the duration of each exercise based on your fitness level and goals.
- The key is to perform these exercises as quickly as possible while maintaining proper form.
- Prevent the Balloon from Falling:
- While you’re doing the exercises, keep an eye on the balloon as it descends.
- Your goal is to complete the set of exercises before the balloon touches the ground.
- This encourages you to move with speed and agility to prevent the balloon from falling.
- Combine with 5 Dot Drills (Optional):
- To add an extra layer of complexity and challenge, you can integrate the Balloon Drill with 5 Dot drills.
- After throwing the balloon into the air, quickly transition to a 5 Dot drill before returning to catch the balloon.
- This combination enhances agility, footwork, and coordination.
7. Depth Jump to Hurdle Hop
The Depth Jump to Hurdle Hop is an advanced plyometric exercise that packs a punch when it comes to improving your lower-body strength, vertical jump, agility, and explosiveness. Combining the elements of a depth jump (dropping from a height and exploding upward) with a hurdle hop, this exercise is a favorite among athletes looking to gain an edge in sports that require explosive power.
Why the Depth Jump to Hurdle Hop?
This exercise offers a host of advantages for athletes and fitness enthusiasts seeking to enhance their physical capabilities:
- Vertical Jump Enhancement: The depth jump component focuses on developing the muscles responsible for explosive upward force, contributing to a higher vertical jump.
- Lower-Body Power: The combination of the depth jump and hurdle hop targets your lower body’s power and explosiveness, making it ideal for sports like basketball, volleyball, and track and field.
- Agility and Coordination: Navigating the hurdle after the depth jump challenges your agility, coordination, and proprioception.
- Functional Strength: The exercise engages multiple muscle groups in your legs, including your quadriceps, hamstrings, glutes, and calf muscles, promoting functional strength.
Instructions:
- Equipment: You’ll need a plyo box or platform for the depth jump and a hurdle or obstacle (e.g., cone, box) for the hurdle hop. Ensure both are stable and safe for jumping.
- Depth Jump:
- Stand on top of the plyo box or platform, facing forward.
- Step off the box, allowing yourself to drop to the ground.
- As you land, immediately focus on absorbing the impact by bending your knees and hips. Maintain a soft landing.
- Hurdle Hop:
- After landing from the depth jump, transition quickly into a hurdle hop.
- The hurdle should be positioned a short distance away from the landing spot. Adjust the hurdle’s height based on your skill level and experience.
- Swing your arms back and explode upward, clearing the hurdle with a powerful hop. Tuck your knees to your chest as you lift your legs over the hurdle.
- Land Safely:
- As you clear the hurdle, prepare to land on the other side.
- Aim for a soft and controlled landing, with your knees slightly bent to absorb the impact.
- Maintain your balance and immediately prepare for the next repetition.
- Repeat: Perform the Depth Jump to Hurdle Hop for the desired number of repetitions, typically 6-10 reps per set, depending on your fitness level.
8. High Knee Lunge on Bosu Ball
The High Knee Lunge on a Bosu Ball is a challenging exercise that combines elements of balance, stability, and lower-body strength. It involves performing lunges while balancing on the rounded, unstable surface of a Bosu Ball. This exercise not only targets your lower body but also engages your core and improves your overall balance and stability.
Why the High Knee Lunge on Bosu Ball?
This exercise offers several compelling reasons to include it in your fitness routine:
- Balance and Stability: The Bosu Ball’s unstable surface forces your muscles, especially those in your legs and core, to work harder to maintain balance and stability.
- Lower-Body Strength: Performing lunges on the Bosu Ball adds resistance and intensity to the exercise, helping you build strength in your quadriceps, hamstrings, and glutes.
- Core Engagement: Balancing on the Bosu Ball activates your core muscles, helping you develop a strong and stable core.
- Functional Fitness: Improving balance and stability is valuable for everyday activities and can also enhance athletic performance and reduce the risk of injuries.
Instructions:
- Equipment: You’ll need a Bosu Ball, which is a half-sphere stability device with a flat platform on one side and a rounded, inflatable side. Ensure the Bosu Ball is properly inflated and placed on a stable surface.
- Setup:
- Stand in front of the Bosu Ball with the flat platform facing up.
- Position one foot on the center of the Bosu Ball’s flat side, balancing on the rounded side.
- Keep your chest up, shoulders back, and core engaged for balance.
- Lunge Movement:
- Begin by stepping back with your free leg into a reverse lunge.
- Lower your body by bending both knees until your front knee is at a 90-degree angle or slightly lower.
- Ensure that your front knee stays aligned with your ankle and doesn’t extend past your toes.
- Maintain a straight back and keep your core engaged throughout the movement.
- High Knee Raise:
- As you rise from the lunge, bring your back knee forward, driving it toward your chest in a high knee raise.
- Return to Starting Position:
- Lower your raised knee and arm.
- Return to the initial standing position on the Bosu Ball.
- Repeat: Perform the High Knee Lunge on the Bosu Ball for the desired number of repetitions on one leg before switching to the other. Aim for 8-12 reps per leg.
9. Medicine Ball Overhead Throw
The Medicine Ball Overhead Throw is a dynamic power exercise that targets your upper body and core, making it an excellent addition to your strength and agility training regimen. This exercise involves explosively throwing a medicine ball overhead, which not only builds strength but also enhances your speed and coordination.
Why the Medicine Ball Overhead Throw?
- Upper-Body Strength: The movement engages the muscles of your shoulders, chest, and arms, helping you develop upper-body strength.
- Core Activation: The explosive throwing motion requires significant core engagement to generate power and maintain stability.
- Coordination: Timing is crucial when executing this exercise. Coordinating the leg drive, torso rotation, and arm extension enhances your overall coordination.
- Explosiveness: The explosive nature of the throw helps you develop speed and power, which can be advantageous in various sports and activities.
Instructions:
- Setup:
- Stand with your feet shoulder-width apart, facing a sturdy wall or a partner.
- Hold the medicine ball with both hands, gripping it firmly.
- Position the medicine ball above your head, with your arms fully extended and your elbows locked.
- Throw the Medicine Ball:
- Begin the movement by forcefully throwing the medicine ball directly overhead toward the wall or your partner.
- Use your entire body for power, including your legs, hips, and core.
- As you release the ball, aim for a high and powerful throw.
- Catch and Reset:
- After throwing the ball, quickly prepare to catch it as it rebounds off the wall or is returned by your partner.
- Keep your eyes on the ball and get ready to react.
- Repeat:
- As soon as you catch the ball, immediately go into the next throw.
- Perform the Medicine Ball Overhead Throw continuously for the desired number of repetitions or a specific duration.
10. Medicine Ball Rotational Throw

The Medicine Ball Rotational Throw is a dynamic exercise that places a strong emphasis on your core muscles and rotational power. This exercise involves twisting and explosively throwing a medicine ball, making it a valuable addition to your training routine for developing core strength, stability, and agility.
Why the Medicine Ball Rotational Throw?
- Core Strengthening: The rotational movement engages your oblique muscles and the entire core, helping you develop a strong and stable midsection.
- Rotational Power: The explosive twist and throw action improve your ability to generate rotational power, which is essential in sports like golf, tennis, and baseball.
- Agility and Coordination: Coordinating your upper and lower body during the throw enhances agility and overall body coordination.
- Functional Fitness: This exercise simulates movements you use in everyday activities and sports, making it a functional and practical addition to your training routine.
Instructions:
- Setup:
- Stand with your feet shoulder-width apart and perpendicular to your target (a wall, partner, or designated spot).
- Hold the medicine ball with both hands in front of your chest, arms extended.
- Throwing Motion:
- Initiate the movement by rotating your torso and hips away from the target. Twist your upper body while keeping your lower body relatively stable.
- Shift your weight onto your back leg as you rotate.
- Explosive Throw:
- As you reach the end of your rotational movement, quickly reverse the twist and explosively throw the medicine ball toward the target.
- Generate power from your core, hips, and upper body.
- Follow-Through:
- Allow your body to naturally follow through with the motion as you complete the throw.
- Your weight will shift forward as you complete the movement.
- Catch and Reset:
- After the throw, catch the medicine ball if it’s coming back to you. If you’re using a wall or partner, be prepared to catch the return.
- Repeat: Perform the Medicine Ball Rotational Throw for the desired number of repetitions. Aim for 8-12 reps per set.
Conclusion
Speed and agility are essential components of athletic performance. Incorporate these agility exercises into your training routine consistently to see improvements in your speed and agility. Remember to start at a level that matches your current fitness and gradually increase the intensity and complexity of the drills as you progress. Agility training is not only beneficial for athletes but can also enhance overall fitness and reduce the risk of injury in everyday activities.